

A logo file alone cannot tell a uniform manufacturer which shade, fabric surface, decoration method or placement will work in daily use. By the end, you will know how to convert an existing brand identity into a production-ready uniform specification that remains legible, practical and consistent across garments and repeat orders.
Key takeaways
- Select fabric colours from physical swatches, not screen RGB or HEX values.
- Specify fibre, weave, decoration method and approved colour references together.
- Test logo size, placement, washing performance and colour coding before bulk production.
- Approve a signed sample with tolerance limits for every repeat uniform order.
How to Convert an Existing Logo into a Uniform Colour System
Choose the uniform palette from a physical textile reference, not from an RGB or HEX value viewed on a monitor. Screens vary by brightness, calibration and background, while cloth changes with fibre content, weave, sheen, dye lot and lighting.
Use a Pantone FHI TCX fabric reference as a starting point, then approve a dyed lab dip on the actual fabric.
| Colour role | Uniform use | Selection rule |
|---|---|---|
| Primary uniform colour | Largest garment areas, such as shirts, trousers or jackets | Choose the brand shade that supports readability, hides workplace soil and works across the main fabric range |
| Secondary colour | Panels, collars, cuffs, side stripes or coordinating garments | Select a shade with clear contrast against the primary uniform colour without competing with the logo |
| Accent colour | Piping, small badges, bartacks or limited embroidery details | Reserve it for small areas; saturated accents can dominate when repeated across many garments |
Ask the manufacturer to record the approved lab-dip number, fabric composition, finish, lighting conditions and dye lot. Keep the signed swatch or an approved reference garment for reorders; the same colour code can shift between batches.
Submit vector logo artwork with a one-colour version and separate files for embroidery, print and woven labels. A screen image cannot show whether thin strokes, narrow gaps or small lettering will survive production. Approve the logo at its actual size, using the selected thread or ink, before ordering bulk uniforms.
How Fabric, Garment Colour and Decoration Change the Final Brand Look
The same specified colour looks different because fibre, surface texture, sheen and garment colour change how light reaches your eye. Cotton versus polyester colour is also produced differently: cotton usually uses reactive dyes, while polyester uses disperse dyes.
- Cotton absorbs colour into a relatively matte surface, so shades often look softer and less glossy.
- Polyester reflects more light, making the same shade appear brighter or more saturated; heat and washing can also cause dye migration.
- A poly-cotton blend can show a heathered, two-tone or less saturated result because its fibres absorb colour differently.
- Knit fabric, including pique, has loops and texture that scatter light; brushed fabric appears lighter or duller than smooth poplin or twill.
- Dark garments need an opaque base for dark garment printing, or the fabric colour will show through and change the logo shade.
Approve colour on the finished garment, not a loose swatch alone. A brushed polo, pique knit, twill trouser and poplin shirt can each produce a different brand look, so retain an approved garment or fabric swatch and record the dye lot for reorders.
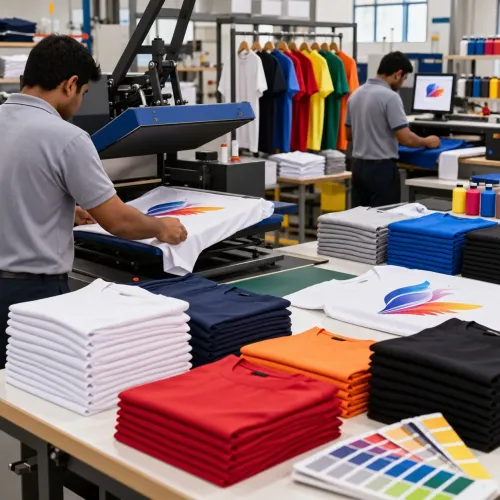
Select decoration according to fabric and artwork. The screen printing versus heat transfer printing choice requires adhesion, wash, stretch and rub checks on the final fabric; test polyester for dye migration, especially with light transfers. Embroidery adds thread sheen and limited shade selection, and dense stitching can pucker lightweight knits.
Use a simplified or woven emblem when fine detail or an exact printed colour matters.
How to Engineer Logo Size, Placement and Department Colour Coding
Set logo dimensions and position from garment landmarks, not from a flat artwork file. A 70 mm left chest logo may suit an adult shirt but overwhelm a petite polo; specify size by garment size when needed, plus distance from the placket, pocket, seam or armhole and a placement tolerance.
1. Reserve the left chest logo for identification at conversation distance. Keep it clear of pockets, darts and buttons, simplify thin strokes and small text, and orient it perpendicular to the placket.
Use a smaller, simplified mark on lightweight knit fabric; high embroidery stitch density can cause puckering, while a woven badge or heat transfer may stay cleaner.
2. Plan the sleeve and back logo around movement and equipment. Rotate a sleeve mark to follow the arm when viewed at rest, and enlarge back artwork only when jackets, backpacks or safety vests will not cover it. Choose high-contrast thread or ink against the actual fabric, not a screen preview.
3. Keep trouser leg and pocket branding compact and durable. Place it away from knees, hems and pocket openings, where abrasion and repeated folding damage fine detail; use a bold one-colour version for workwear exposed to dust, oil or frequent washing.
4. Assign department colours to defined garment zones, such as collars, sleeve bands or piping, and record the exact shade and size range. Use text, symbols or job titles as well as colour so colour-blind staff and low-light workers are not forced to guess a role.
Match zippers, buttons, binding and sewing thread where those trims remain visible.
How to Test Uniform Colours for Work, Washing and Repeat Orders
A durable colour programme needs evidence on finished fabric and decoration, not a screen proof. Set an approved lab dip and define acceptance limits for shade change, staining, logo contrast and dimensional change after the intended laundering process.
Use this approval sequence:
1. Specify the wash method, water temperature, detergent and number of cycles. Inspect a pre-production sample after washing for fading, dye transfer, pilling, seam puckering and shrinkage.
2. Request colourfastness testing for the fabric. ISO 105-C06 covers washing, ISO 105-X12 covers dry and wet rubbing, and ISO 105-E04 covers perspiration. Passing one test does not prove performance in the others.
3. Test sunlight exposure with ISO 105-B02 when garments face outdoor work or strong window light. Expose the actual shade, not a substitute swatch, and compare the result against the approved lab dip.
4. Apply the workplace chemicals you expect, such as chlorine bleach, sanitizer, detergent, oil or cleaning solvent. Test the complete garment and printed or transferred logo for colour change, staining, adhesion and legibility.
5. For polyester decoration, check dye migration during curing and after washing, then perform wash, stretch and rub checks. Cotton results do not predict polyester results.
6. Require fabric dye lot control for replenishment. Record each lot number, retain an approved swatch or garment, and agree the permitted lot-to-lot shade difference before ordering replacements.
How to Brief a Bangalore Manufacturer and Approve a Reproducible Uniform
Choose by repeatability, not by sample price. Compare the cut, fabric construction, colour control, decoration method, minimum order, lead time and replacement plan before selecting a programme.
| Option | Compare | When it applies | Main risk |
|---|---|---|---|
| Fully custom uniform | Pattern, fabric, trim, colour and graded logo placement | You need a distinctive garment or precise role-based design | Higher sampling time and larger re-order commitments |
| Standard-colour garment | Existing fabric colours, available sizes and decoration options | Your brand fits a supplier’s stock colour closely | The approved shade may vary between fabric lots |
| Simple polo programme | Ready polo, one or two logo positions and limited colour choices | You need fast deployment and easy staff replacement | It may not suit formal, protective or highly detailed branding |
Submit logo vector files in AI, EPS or PDF format, plus a one-colour mark and separate embroidery, print and woven-label artwork. Include minimum stroke and gap rules, approved thread or ink colours, and the intended logo dimensions.
Your garment tech pack must state fabric composition, weight, colour reference, lab-dip approval, seam details, fixed placement measurements, tolerance and size-specific artwork. Add a uniform style guide showing approved combinations across shirts, trousers, jackets and accessories.
Run the uniform manufacturer sampling process on the actual fabric and finish, then approve a signed sample or retained swatch with dye-lot identification. Colors Inc can use that record to check replacement garments against the original rather than trusting a screen image.
Frequently asked questions
How do you convert an existing logo into a uniform colour system?
Separate the logo’s primary, secondary and accent colours, then match each to physical textile and decoration references. Define approved substitutes for dark and light garments before production.
How do fabric and garment colour change the final brand look?
Fibre content, weave, sheen, dye lot and lighting alter perceived colour. Embroidery, screen printing, heat transfer and direct-to-garment printing also produce different saturation and texture.
How should you set logo size, placement and department colour coding?
Choose placement according to garment type and movement, specify logo dimensions in centimetres, and test visibility at normal working distance. Assign department colours with a written code that does not rely on shade alone.
How do you test uniform colours for work, washing and repeat orders?
Wash sample garments using the intended care process, inspect colour change, shrinkage, decoration adhesion and seam performance, then record the approved reference and acceptable tolerance.
What should you include in a brief to a Bangalore uniform manufacturer?
Provide garment measurements, fabric composition, physical colour references, artwork files, decoration method, logo dimensions, placement diagrams, department codes, size quantities, care instructions and sample-approval rules.